
Cleaning
How Often Should You Clean Your Dryer Vent? The Ultimate Guide
One question I hear from my readers is, Clare, how often should you clean your dryer vent? My answer to that question is: you need to clean your dryer vent at least once a year, more if you use it quite a lot, and it’s very important to stay on top of it. If you don’t, it can lead to problems, and you may have a fire in your house. The scary thing is that often driers catch on fire at night when everyone is sleeping and can catch hold so quickly. So, you need to stay on top of cleaning your dryer vent. Whether your vent is five feet long or twenty-five feet long, the risk of fire is still the same, so make sure you clean your dryer vent at least once a year.
This post contains affiliate links, and The Organizer UK may earn commissions for purchases made through the links in this post. For more details, see here. Thank you so much for your support!
I use my tumble dryer almost every day, mainly because I live in Manchester, where it’s perpetually raining. I live in a family of four and we have two cats, so I clean my drier vent more often than just once a year. I usually schedule my duct cleaning for spring, summer, autumn, and winter at the beginning of each season. I clean my lint trap vent on the washing machine every time I’ve used it. I usually brush it down with a stiff brush like this one and get into all the corners to ensure there’s no lint left.
How do dryers catch on fire?
Dryer fires are all too common and happen when the dryer vent or air duct gets blocked with a lint build-up. Lint is fine, so it travels past your lint filter and into the tube vent outside your home. Your clogged dryer vent becomes plugged with lint, and your dryer can’t breathe properly, so it starts overheating. When your driver overheats, the highly flammable lint catches fire, and that’s when your machine has the potential to create a house fire. Lint will build up on itself, so as soon as it starts to gather, it will gather more fluff quickly, to the point where it can close off entirely and restrict the airflow of your dryer, it’ll take a lot longer for your clothes to dry and it will become a fire hazard.
Different types of dryer vents
There are a couple of different ways to clean your dryer vent, and the method you use will depend on your type of vent.
- You may have a short tube made of aluminum or plastic that goes straight to the outside of your house from the back of your dryer. This is the most straightforward vent to clean because it can be reached using a long-handled brush like this one with no attachments needed.
- However, many more of you may find that you have a big, long duct that goes maybe fourteen to twenty feet. The duct might go out onto the roof or around the house to let the vented air from the laundry room go outside.
Dryer vent cleaning kits
Whichever way your dryer is vented, you need to know how to clean it.
There are many products on the market to help you do this job, these are the two kits I would recommend for cleaning your dryer vent. Whichever one you choose will depend on how long your dryer vent is.
This lint trap dryer brush is excellent for cleaning inside the dryer vent. It is designed to reach tight spots and hard-to-clean places that are impossible to reach. It is long and flexible, and the galvanized steel stem bends to clean the narrow vents inside your dryer. The nylon bristles grab and remove lots of lint build-up, leaving your dryer vent clean and free from lint.
This Nylon Rotary Dryer Vent Cleaning Kit comes with a synthetic brush head, a wooden-handled brush, and bendable rods to reach stubborn debris from the dryer duct. You can connect multiple rods to make the brush longer to clean the duct yourself. There is no need to call out expensive professional dryer vent cleaning services. This kit works perfectly with a drill. All you need to do is connect the drill to the rod with the hexagonal adapter, and then it can easily remove the stubborn debris from the dryer vent through rotating force. Extend the dryer’s life and make your dryer safer and more efficient by using the flexible rods from the dryer duct right through to the dryer vent opening outside your home.
This dryer vent vacuum attachment sucks up all the lint as you are removing it with the full toolkit . This attachment is used to get in confined spaces and should attach to most home vacuum cleaners. Attach it to the vacuum and insert it as far as possible into the lint trap to remove the remaining lint.
The full kit. You can buy the full toolkit in this bundle which includes all the tools mentioned above and rods to reach 30 feet.
How to use the lint trap dryer brush.
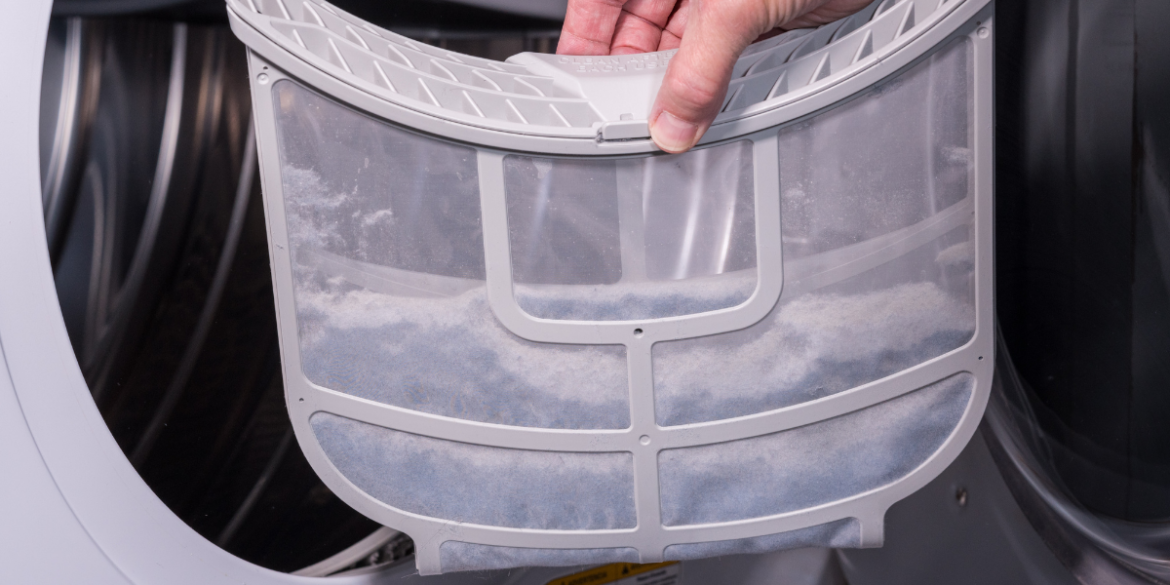
First, your dryer has a lint trap designed to catch a lot of lint before it gets into your ductwork. So, you should make sure you clean the lint trap after every single load. If you don’t clean yours out after every load, you should go and check it and see how loaded it is with lint. It’s essential to keep the lint trap clean to prevent house fires. The lint trap dryer brush is used to clean around the front lint trap of your dryer.
- Remove the lint trap and make sure the screen is clear.
- Clean the lint and dispose of it away from the dryer so it doesn’t catch fire. As we’ve said before, lint is highly flammable.
- Insert the vent brush into the lint trap and move it from side to side and up and down, twisting a little as you move the brush. Try to clean all the lint out of the crevices.
How to clean your dryer duct using the rotary brush and rods
This is a job that most homeowners neglect because they don’t realize that it’s a fire hazard. The lint from your dryer builds up on the inner walls of the duct, all the way from the dryer to the outside of the house, and when the hot air comes out of your dryer, it can cause a fire.
The dryer vent cleaning kit comes with a brush that you can use to clean out your dryer lint filter or to clean the smaller vents on your machine.
The cleaning kit also comes with the brush you’ll use to clean the vents and ducts and even has an adapter for putting the rods onto your drill. The drill helps to rotate the brush as you push it through the tube and will help to dislodge all the clogged lint that sticks to the side of the vent walls.
The dryer kit also comes with an assortment of rods. These flexible rods get around all the twists and bends of the ductwork, from where the duct starts to the outside of the house. As the brush spins around, it scrapes all the lint off the inside walls of the duct. You can buy kits with just a couple of rods, but you can purchase an additional extension kit here. You will need to measure the length of your vent to ensure you have the correct amount of rods to cover the area.
Before you start, you will also need:
- A cordless drill to attach to the rods.
- A screwdriver to loosen the clamp band on the vent pipe.
- A pair of pliers to disconnect some of the ductwork
- A set of alan keys to attach the drill
A step-by-step guide to cleaning your dryer duct.
- Cut off the power supply. Determine if you have a gas or electric dryer. Electric is far more common, but some people still have gas dryers. If you have a gas dryer, turn off the gas supply before moving the dryer or disconnecting anything. If you have an electric dryer, access the rear of the dryer and unplug the power. You’ll see two things at the back of the dryer: a power outlet and the duct. Unplug the power socket, then follow the duct from the machine to the wall.
- Remove the dryer duct. You must remove the drier duct from the smooth duct built into the house. They are usually clamped together with a band clamp with a screw that you unscrew to release it. It should be pretty easy to remove the drier duct. You loosen the band clamp, and it should slide off.
- Check the drier duct for any damage. Check the flexible duct from the back of the dryer to the house to ensure it has no severe damage or kinks. If you have any holes or squeezed areas, it will restrict the airflow, and you should replace the duct immediately.
- Find your dryer exhaust port. Ensure you know exactly where your dryer exhaust port is outside your home. If you don’t know where it is, walk outside your home, search for the fabric softener smell, and look for a small, square, or wedge-shaped vent. Sometimes you might find that the vent opening is situated next to an air conditioning condenser which would be unfortunate because as the lint blows out of the port, it gets sucked back into your condenser. So, if yours is like this, you should regularly clean out your air conditioning condenser coils.
- Clean the dryer exhaust port. Once you’ve located your dryer vent port, it’s easy to remove it so you can clean it. Remember that if you can find your dryer vent outside, it might be on your roof. If it is on your roof, reaching to clean will be much more difficult. Skip this step if you’re not happy going up on your roof. You can clean up to this exhaust port from inside the house.
- Assemble the brush. Attach your brush to the threaded end of the rod, then tighten the set screw with an Allen key to ensure that the brush will not come unthreaded inside your vent because you’d never get it back out if it came detached from the rod.
- Attach the brush to your drill. A little adapter for your drill is at the other end of this rod. Clamp your drill onto the adapter rod. Make sure it’s nice and tight.
- Always go in a clockwise direction with the drill. It’s essential to make sure you spin your drill clockwise for the entire process. Because if you put your drill in reverse, it will unscrew the rods and brush head, and they might fall off in the duct.
- Attach all the other rods. Attach all the rods, and repeat the process until the duct is completely clean and the brush is bumping up against or has come out of the vent outside the house.
- Start to move the rod into the duct. Very slowly, move the brush in and out of the duct, going a little deeper with each stroke until the whole of the first rod is into the duct.
- Check for any resistance. When you start to feel some resistance, go outside and check to see if you are at the end of the duct or if you’ve come entirely out of the port. You may have hit a tight kink in the ductwork, so don’t force the rods, or they may get tangled up in your ductwork. When you start feeling resistance, check to see if you’ve hit the vent outlet outside the house. There is a little trap door inside the port, and if you try to pull the brush back in, it might get stuck on the trap door. If this happens, prop the trap door out of the way and then feed the brush back in to pull the brush and rods back out.
- Slowly remove the rods. To remove the rods, keep your drill running forward, pull the rods very slowly out of the vent, and remove the drill from the end of the rods.
- Clean the dryer duct. You must also remember to clean the duct from the dryer to the house. Don’t forget this step because lint will also be in there. If you’ve got a flexible vent, try to flatten and straighten it out as much as possible, and then clean it like you cleaned the vents in the house; be careful. These vents can be fragile, and the brush can cause irreparable damage.
- Clean inside your dryer. You should remember to clean inside the dryer as well. The vent inside the dryer is a long tube, so it is pretty easy to clean.
- Reassemble all the parts. Reassemble by putting the flexible hose back onto the back of the dryer. When you put the flexible hose back on, it sits completely over the smooth lip and tightens the band clamp to lock it in place.
- Check the dryer is working. Start the dryer and ensure it gets warm and is venting properly outside the house.
Latest cleaning-related posts
- Calling all dog owners: How to clean fake grass
- How to clean artificial flowers the easy way
- How to cook a gammon joint in a slow cooker
- How to clean mold out of a fridge
- How to get crayon off wood: Easy ways!
We hope you enjoyed learning how to clean your dryer vent. If you’ve any questions, leave a comment below!